LS3040 extraction / bed problems
Posted: Fri Sep 07, 2012 10:51 pm
Was cutting some ply today, quite complex parts using a full sheet of A3 ply when part way thru the unburnt gas produced flashed off with big pop and lifted the sheet off the honeycomb.
Lifted the honeycomb off to clean up and saw that the extraction slot is level with the top of the honeycomb but there is no way to extract any unburnt gasses from below the honeycomb? Can't see what's underneath as it's a solid plate on the bottom but still room at the side to allow the 'box' to fill up with gas and no form of extraction.
So came to remove the plate and see what's under there.
Problem 1:
The plate is secured to the 4 jacking screws by 8 M4 CSK screws, two per screw. These are 20mm long and screwed into the jacking nuts but then have been double lock nutted from underneath.
The only way to remove these is to remove the whole box from the lase and strip from underneath. WTF ?? How do you remove this for cleaning purposes without stripping the machine ?
8 screws just screwed into the nuts is sufficient, I mean if you secure something important like the head with 3 screws and a crude plastic bearing why do you need 8 screws, tapped holes in the jack nuts and 16 lock nuts for a part that doesn't move ?
Anyway hint here just pop the heads off with a 4mm drill, wind the screws out from the bottom after removing the plate and replace with 8 new M4 x 12mm screws.
Now if you pop 3 1 1/4" holes in the end as shown here.
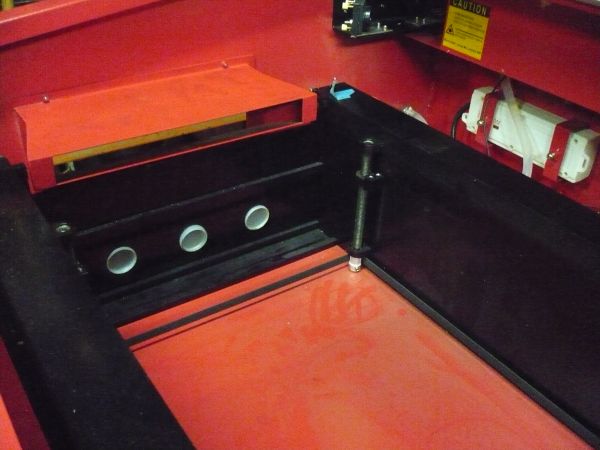
Then follow thru onto the extractor hood and do the same, you can fit three pieces of plastic waste pipe 80mm long.
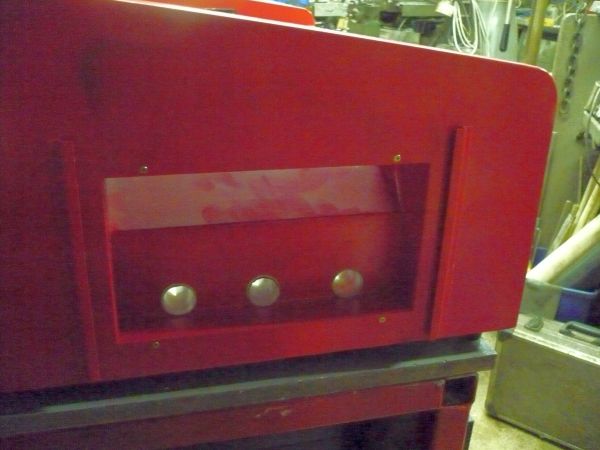
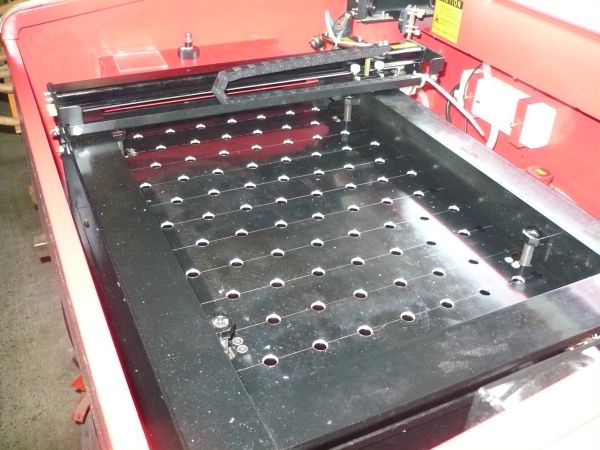
Last job is to drill a series of holes in the base plate to allow the box to extract via the fan.
ran the plywood job again and you could see a marked difference in how the fumes were dealt with.
Next job is to fit a better fan assembly.
Lifted the honeycomb off to clean up and saw that the extraction slot is level with the top of the honeycomb but there is no way to extract any unburnt gasses from below the honeycomb? Can't see what's underneath as it's a solid plate on the bottom but still room at the side to allow the 'box' to fill up with gas and no form of extraction.
So came to remove the plate and see what's under there.
Problem 1:
The plate is secured to the 4 jacking screws by 8 M4 CSK screws, two per screw. These are 20mm long and screwed into the jacking nuts but then have been double lock nutted from underneath.
The only way to remove these is to remove the whole box from the lase and strip from underneath. WTF ?? How do you remove this for cleaning purposes without stripping the machine ?
8 screws just screwed into the nuts is sufficient, I mean if you secure something important like the head with 3 screws and a crude plastic bearing why do you need 8 screws, tapped holes in the jack nuts and 16 lock nuts for a part that doesn't move ?
Anyway hint here just pop the heads off with a 4mm drill, wind the screws out from the bottom after removing the plate and replace with 8 new M4 x 12mm screws.
Now if you pop 3 1 1/4" holes in the end as shown here.
Then follow thru onto the extractor hood and do the same, you can fit three pieces of plastic waste pipe 80mm long.
Last job is to drill a series of holes in the base plate to allow the box to extract via the fan.
ran the plywood job again and you could see a marked difference in how the fumes were dealt with.
Next job is to fit a better fan assembly.